If you want your home router to be accessible from the internet through an IONOS URL you will probably need to configure Dynamic DNS (DDNS). IONOS needs to know the IP-address, your purchased domain should point to for them to correctly redirect anyone calling your domain. In most cases your internet service provider (ISP) will assign your router a different IP-address every day. For that reason you can’t just give IONOS a static IP-address once and be done with it. You’ll want to automate giving IONOS your routers IP-address through configuring Dynamic DNS in your OPNSense router.
Set up IONOS developer account
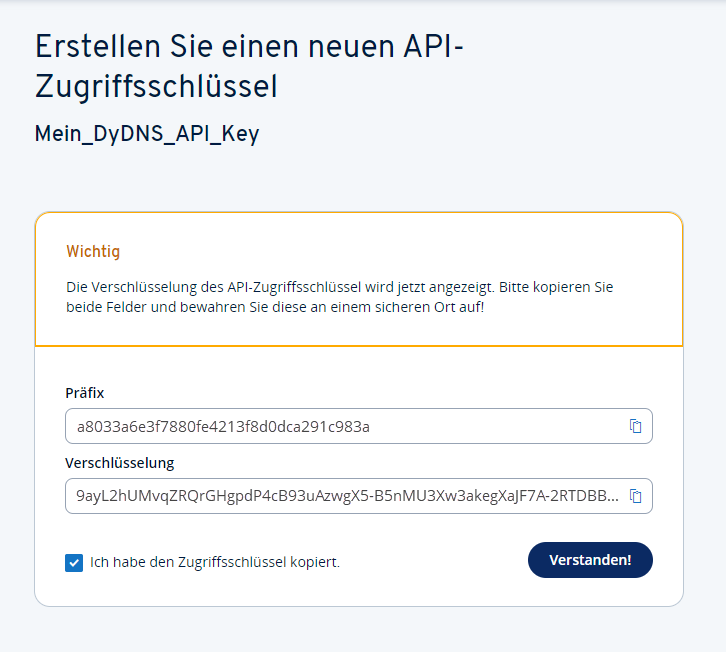
First go to the IONOS API Developer portal and create a new key with any name you’d like. Finally there will be a public prefix and a private key displayed. The private key will not be displayed once you close the popup so it is best to note down both of these keys securely for later use.
Get the update URL
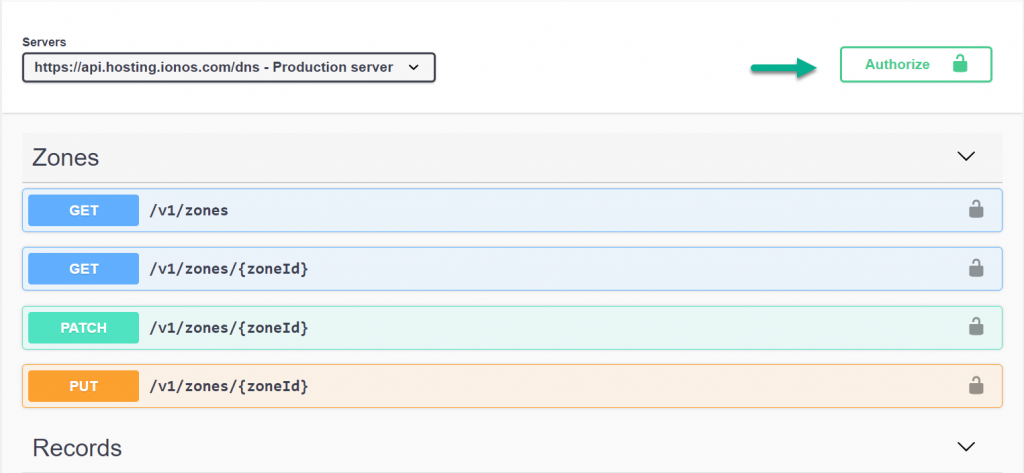
To update the dynamic DNS entry for your domain you will need to call a custom URL given to you by IONOS. To get this URL go to the DNS API documentation page. On the right side of the page click on “Authorize”. In the opening dialog you will need to put in the two keys you obtained in the previous step in the form PREFIX.PRIVATE_KEY. Not the dot in the middle of the keys. Finally click “Authorize” and “Close”.
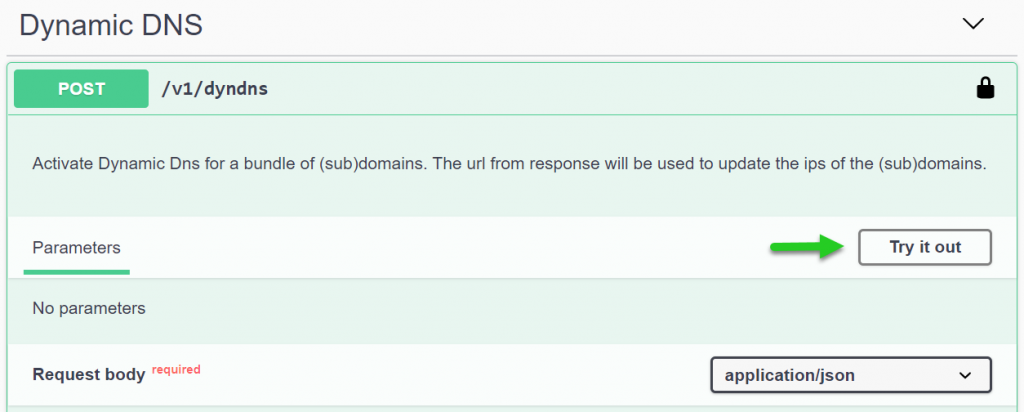
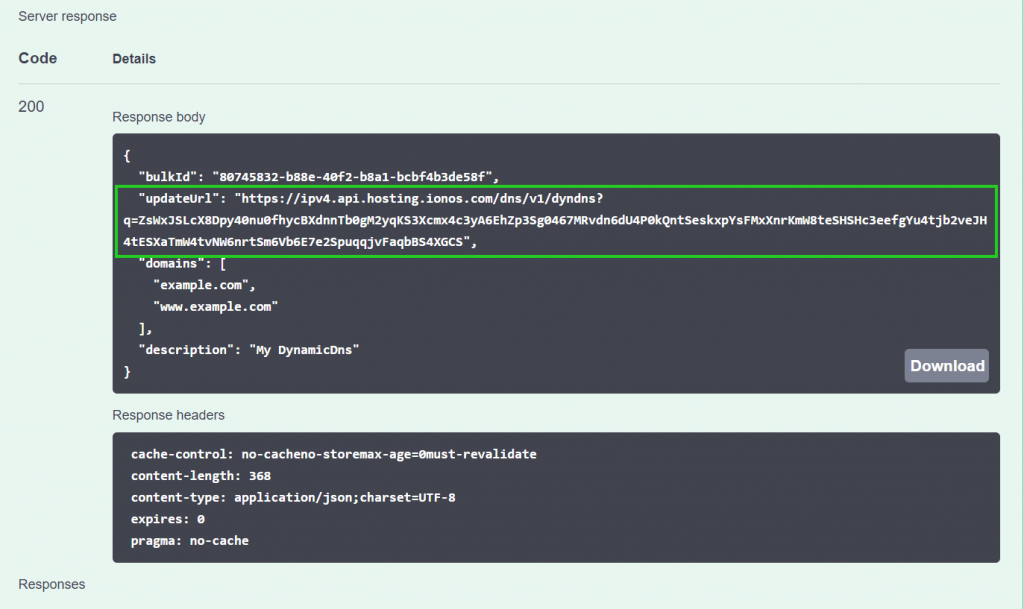
After you have authorized yourself you can access the API. Go to the “Dynamic DNS” section and open the POST entry. In the top right corner of the opening panel click on “Try it out”. A text box will appear a bit further down.
Edit the default text in the textbox to contain all domains and subdomains you’ll want to automatically update. Every domain needs to be surrounded by quotation marks and seperated from the others by a comma. Just like the default text.
If you want also change the value of the description field, but this is optional. Finally click on “execute” below the textbox.
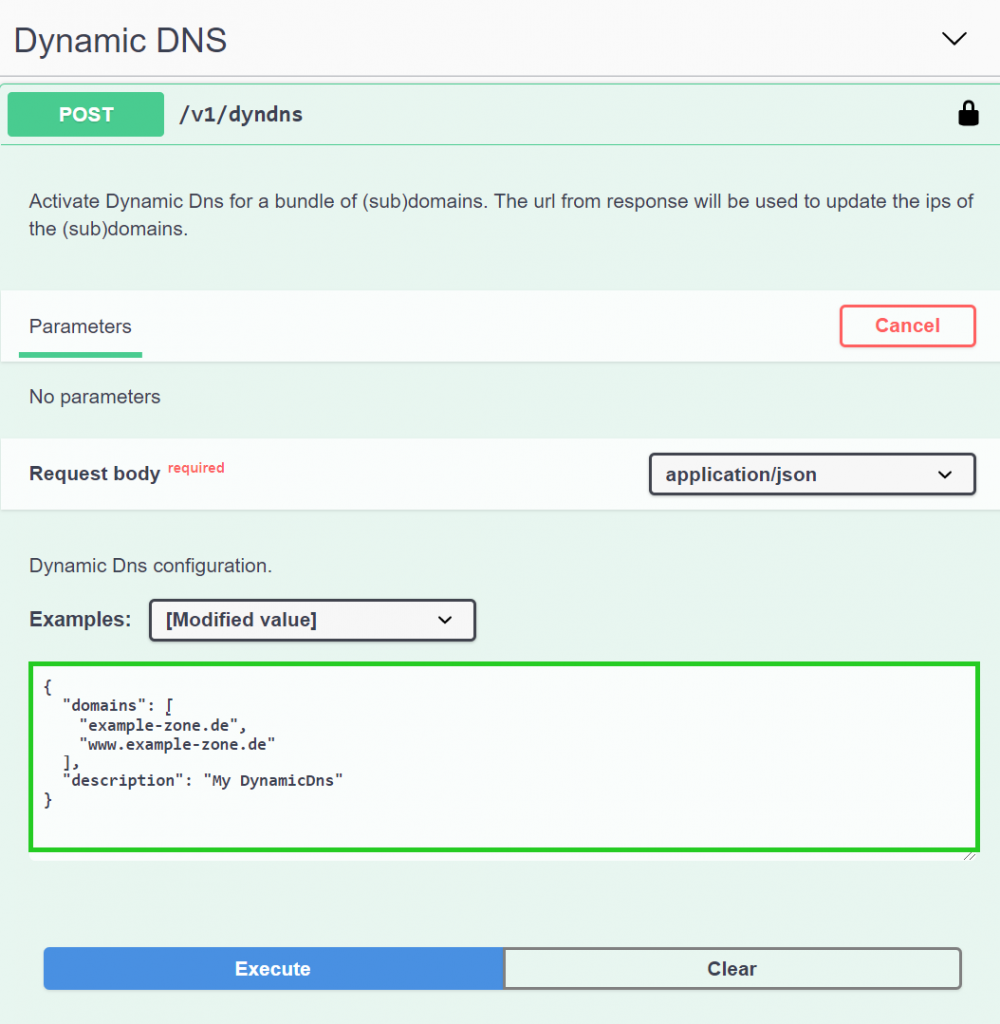
The server will now generate a custom update-URL for you and return it. You can retrieve it if you scroll a bit further down to the responses section where it should say 200 on the left. Within the black box you’ll find a key called “updateUrl”. Copy the URL within the quotation marks right behind this key. It should start with https:// and will probably go over multiple lines until the next quotation mark and comma.
Configure OPNSense
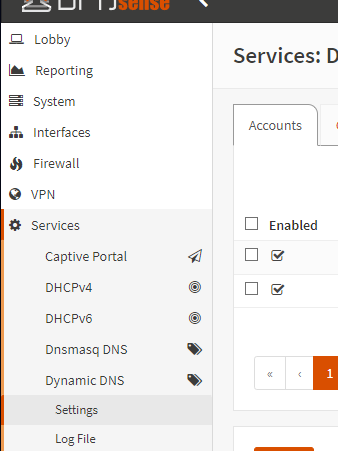
Once you have the update URL you can switch over to the Web-UI of your OPNSense router. Open the Dynamic DNS settings under Services > Dynamic DNS > Settings.
If you can’t see the Dynamic DNS service you might need to install the os-ddclient plugin under System > Firmware > Plugins.
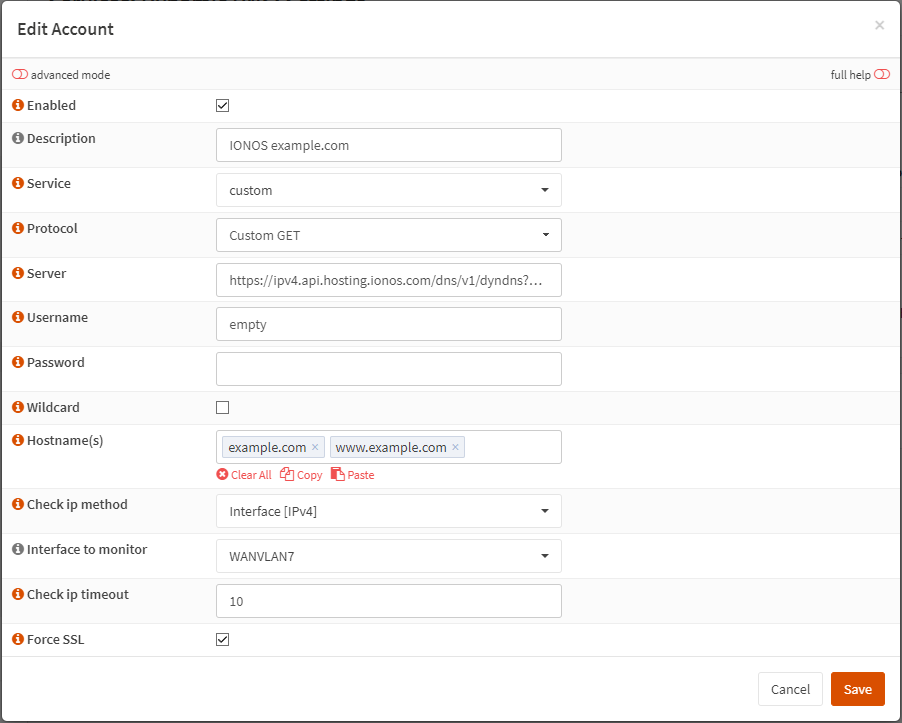
Lastly add a new Entry under Accounts. There are only a few things you’ll need to set in the opening dialog:
Description (optional)
Give the Account a good description to better recognize it later.
Service
Select “custom”.
Protocol
Select “Custom GET”.
Server
Here you’ll need to paste the update URL you got from the IONOS API earlier.
Username
You might need to write something in this field although it is not required. Just type anything, like “empty”.
Hostname(s) (optional)
This field is optional again but for better understandability you should input all the domains you want to update.
Check ip method
Configure the method with which OPNSense should check for IP-address changes. Usually you listen to one of your OPNSense interfaces. This would mean select “Interface [IPv4]” here.
Interface to monitor
Select the interface which should be monitored for IP-address changes. Probably your WAN interface.
Finish the configuration by clicking on “Save” and “Apply”.
The update might not work already. What you need to do in this case, is to set the Backend under General settings to “native”.
Result
It might take a moment but the Current IP-address under Accounts should now updated with your current IP-address. Also in within your IONOS account you should see the IP-address update. Whenever the interface updates its IP-address from now on, OPNSense will automatically notify IONOS of the change and you will be able to access your home network from your custom domain.
